To all the Artists, Creatives and Makers, to Writers, Bloggers, and Publishers, to Musicians, Actors, Dancers, and Performance Hall Directors, to all the Designers, Architects and Curators, to each Critic, Reporter and Announcer, To the Buyers, Sellers and Collectors, to the Tire Kickers and the Obsessed, to those who read blogs,
All the Best through out the New Year!
Wednesday, December 25, 2013
Sunday, December 15, 2013
Odd Jobs At The Nomadic Fungi Institute
As the archivist at the Nomadic Fungi Institute my duties have turned out to be much more complex than just putting old news paper clipping into folders and putting the folders into file cabinets. For example, the NFI just launched their new NFI logo. To mark the occasion we hand printed a limited edition of NFI artists trading cards. Fifteen of these we sent to the Art.Science.Gallery event Art/Science Trading Cards. The remaining cards will be given out at up coming art events, while others will be used as thank you gifts to new NFI members.
Better wash the ink off my hands before going back to stuffing news paper clipping into files and sticking files into filing cabinets.
Better wash the ink off my hands before going back to stuffing news paper clipping into files and sticking files into filing cabinets.
Friday, November 1, 2013
SculptCAD Rapid Artists 3D Printed Sculpture
The SculptCAD Rapid Artists Project was organized by Nancy Hairston in 2010 as a way to showcase the versatility of rapid prototyping 3D printing. Each year she has asked artists to come to the SculptCAD offices and learn how to use this technology, then make some art.
The SculptCAD Rapid Artists 3D Printed Sculpture show at the One Arts Plaza is a quick sampling of some of the artwork that has been produced over the years. This show was presented to dove tail with the Aurora Dallas event. Artist in the show are: Steven Hopwood Lewis, Shane Pennington, Heather Gorham, Patty Delarios, Shawn Smith, Mark Grote, Morehshan Allahyari, Dave Van Ness, Joshua Goode, Elliot Johnson, Shelle Carring, Joshua King, and myself, Brad Ford Smith.
Below are a few snaps from the exhibit.
 |
| Brad Ford Smith |
Brad Ford Smith - Servings is a nod to the Balloon Dog sculpture by Jeff Koons.
 |
| Heather Gorham |
Heather Gorham - Is it a circus trick or a view of the universe?
 |
| Elliot Johnson |
Elliot Johnson - Hellbender, a salamander with self-esteem issues.
 |
| Shane Pennington |
Shane Pennington - Pushing the binderies between art , technology and nature with his living bonsai tree with spliced in resin print.
Wednesday, October 23, 2013
Aurora Dallas 2013 or Aurora Project or Aurora 2013 or Dallas Aurora
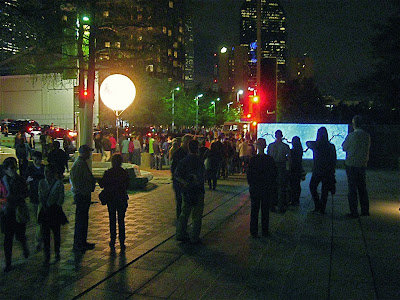
Aurora is an art event held one night in the Dallas Arts District that features new media artwork in mediums such as light, digital projection, performance and sound. This year all the Arts District Institutions joined in to make it a 68 acre block party.
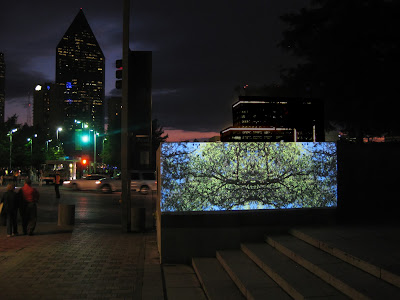
UP is composed of 63 photographs taken while hiking the back woods of Yosemite National Park. UP is a simple concept: we spend too much time looking at our hands and feet, and not enough time looking UP. By mirroring the images of treetops and projecting them onto a horizontal surface, this simple shift and change of angle illustrates the otherworld quality of simply looking UP.
Keeping this project very simple is something I learned from my last Aurora encounter. People in crowds never stop for very long, perhaps 3 seconds. In that short amount of time you have to grab them with something that is striking AND recognizable.
Swirling colors and complex geometric shapes or long slow narratives just get passed by.
With UP, the simplicity is its strength. A photo that is mirrored creates a rorschach test experience. It is what it is but it could be something else as well. The added effect of one image fading into the next so that there is a brief 4 seconds of overlapping taps into the basic human instinct to search out recognizable patterns and solve puzzles.
The end result is that the crowd stopped. Some people watched the whole 3 minute loop, pointing out to each other what they saw hidden in the trees.
Here are a few links to Aurora reviews and posts:
Bill McCarthy videoWFAA photos 49 and 50 are my favorites.
FrontRow D Magazine
Monday, October 14, 2013
Opened For The White Rock Studio Tour
Well, I got so busy with the White Rock Lake Artists Studio Tour I didn't have time to post these photos of my clean and sorted studio.
Sunday threatened rain but then turned into a very beautiful day, then people drove up, walked up, peddled up on their bikes. It was strange to be standing in my studio and to see it filled with people.
Happily artwork did find new homes, people signed up for BFS blog, and I reconnected with several art friends.
One unexpected benefit, I got in a lot of practice on my elevator speech. Short and to the point.
So, now I just need to trap a wealthy art patron in an elevator and I'll be set!
The studio tour started out pretty slow on Saturday. The humidity was so high that people were covered in sweat and ended up going to only 2 or 3 studios before calling it a day.
Happily artwork did find new homes, people signed up for BFS blog, and I reconnected with several art friends.
One unexpected benefit, I got in a lot of practice on my elevator speech. Short and to the point.
So, now I just need to trap a wealthy art patron in an elevator and I'll be set!
Tuesday, October 8, 2013
Cleaning The Studio For the Studio Tour
Cleaning is a lot like making art, there is always a point, despite all the hard work, when it just looks like crap. That's when you keep pushing, make some decisions, make some changes and then things fall together. Almost like you knew what the hell you were doing from the very beginning.
I am participating in the White Rock Lake Artists Studio Tour this year, that's why I'm cleaning up my studio. It has nothing to do with the fact that the studio has become a pigpen. There's something comfy about dust bunnies, old news papers and clusters of dirty coffee cups. It's like I never moved out of my collage dormitory. Well... now that I think about that dorm room, it was pretty disgusting and now my studio is a pigsty!
So this is my studio after a whole day of cleaning. It looks pretty bad. One thing that always throws me is that in order to clean my studio I also end up cleaning the shed, the kitchen, the office and the living room. It's not just a matter of putting away a few odd tools. There's also piles of books, at least one load of dirty dishes, shoes, furniture, nicknacks, and why the hell is this Christmas wrapping paper doing out?!
Once everything is cleaned and put away I'll start pulling out stacks of artwork and sorting through what I want to show during the tour.
The studio tour is Saturday and Sunday Oct 12th and 13th from 10:00 am to 5:00 pm. There are 45 studios and 5 art centers on the free self guided tour. All are based around White Rock Lake. You could hit most of them in one day on your bicycle!
Here's a link to the MAP
Hope you can drop by, Brad
Sunday, October 6, 2013
The Gate Way To The Studio
As the opening day for the White Rock Lake Artists Studio Tour gets closer I'm working on my To Do List. Today that list included cleaning up the yard. As you can see from the photo above we practice a more natural approach to the typical Dallas manicured lawn.
The house built by my parents in 1956 is snuggled under a canopy of pecan trees that keeps everything cool and shaded. The ground is basically overgrowth. We planted a few things like lantana, sage, cacti, and a fig tree. Most everything else was inherited or miraculously sprouted on its own. Not to brag but this summer I mowed twice.
Back to the tour. Thinking about crowd control and traffic patterns. How do we get people from the curb to the studio. Each studio on the tour will have a small yellow sign that says Studio Tour. It's been suggested to hang balloons from it just to make it more visible.
Using a yellow ribbon to act as a guide, we laid out a path that takes everyone from the curb, down the driveway, around the side of the house to the back yard. From there they just follow the sidewalk to the patio, through the beveled glass french doors into the studio.
The studio tour is Saturday and Sunday Oct 12th and 13th from 10:00 am to 5:00 pm. There are 45 studios and 5 art centers on the free self guided tour. All are based around White Rock Lake. You could hit most of them in one day on your bicycle!
Here's a link to the MAP
Hope you can drop by, Brad
Tuesday, October 1, 2013
White Rock Lake Artists Studio Tour 2013
In 1992 three artists decided to organize a self guided studio tour of artists living in East Dallas. It went off so well they did it agin the next year. 21 years later the White Rock Lake Artists's Studio Tour is a 2 day event that showcases 40 artist's studios and 5 art centers. It covers over 30 art disciplines from kiln formed glass to custom furniture. From incised pottery to photography, and lets not forget painting, printmaking and sculpture.
I live almost in the heart of the WRLAST, and have enjoyed making friends with the artists in my neighborhood. By seeing how they set up their studios I learned a lot about space management and found new sources for supplies. Plus there is something special about seeing artwork and artists in their natural and very personal environments.
A few years back, after much prodding by artists friends I contacted WRLAST about joining the tour. After three years on the waiting list I am finally on the tour!!!
So here's some details:
This event is free and open to the public
Studios are located in East Dallas around the White Rock Lake
Here are some links you'll need:
WhiteRock Lake Artist's Studio Tour website
Tour map with PDF download
Tour Map for your iPhone icihere.com
Maps are also available at all the studios on the tour.
It's going to be a great weekend. Drop by and say Hi. Stroll the neighborhood and see some art.
I live almost in the heart of the WRLAST, and have enjoyed making friends with the artists in my neighborhood. By seeing how they set up their studios I learned a lot about space management and found new sources for supplies. Plus there is something special about seeing artwork and artists in their natural and very personal environments.
A few years back, after much prodding by artists friends I contacted WRLAST about joining the tour. After three years on the waiting list I am finally on the tour!!!
So here's some details:
Tour dates; Oct 12th and 13th
10:00am- 5:00pmThis event is free and open to the public
Studios are located in East Dallas around the White Rock Lake
Here are some links you'll need:
WhiteRock Lake Artist's Studio Tour website
Tour map with PDF download
Tour Map for your iPhone icihere.com
Maps are also available at all the studios on the tour.
It's going to be a great weekend. Drop by and say Hi. Stroll the neighborhood and see some art.
Tuesday, August 6, 2013
Kansas City Revisited
 |
| View from atop the World War monument |
Of course with the Kansas City Art Institute as my alma mater, I had to take stroll around campus and see how the old brick and mortar were holding up.
 |
| Warwick House at KCAI |
 |
| Painting Studios at KCAI |
 |
| Selfie with Imogene Bruton and Hades |
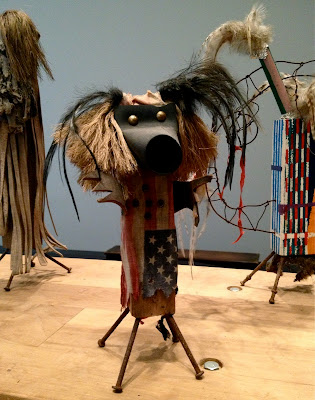
As for myself, I was a bit surprised to respond so favorably to Brad Kahlhamer's Calder-esque Kachinas. He uses found materials in a manner that taps into handcraft while avoiding assemblage cliches.
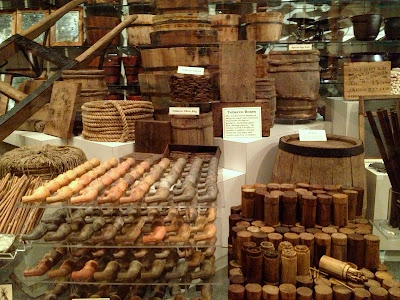
On my must see list was a visit to the Steamboat Arabia Museum. The Arabia sank in 1856 just a few miles up the Missouri river from KC.
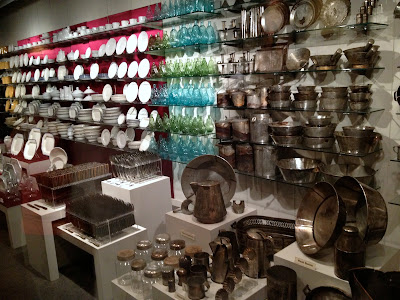
It was fully loaded with items that were to be sold further up river. Crates of pots and pans, barrels of dinnerware...
...Tobacco products such as clay pipes and wood cylinders of matches...
Here is their conservation studio. It's open to public tours. They've spent 8 years conserving shoes from the Arabia. A truly outstanding collection and exhibit.
On Sunday, the local VW club gathered at the City Market. My family had a VW bus when I was growing up, and I drove a Karmann Ghia while I was attending KCAI. So this rally brought back some buried memories.
The National World War 1 memorial is a prominent feture on the KC skyline. The large National World War One Museum is appropriately entrenched under the monument. The museum with its life sized dioramas of trench war fair and the thousands of artifacts presents the very complex issues of the Great War in a comprehensive manner. The monument itself, a big stone column thrusting upward into the open sky makes it pretty clear what was at the root of the conflict.
I started watching the second season of Downton Abbey, so this museum visit has really filled in the gaps that the TV show can only hint at.
Well, that's my latest adventure. If you click on all the links I've provided it'll almost be like you were there.
Wednesday, July 17, 2013
5 Preparations For A Successful Studio Visit
As you can see from the photograph, there are a lot of projects underway in the studio, which is great. It's like a cozy cave of self indulgence. But for the uninitiated visiter it's visual chaos, bordering on a hoarder's hovel.
This week I have a studio visits lined up with Heyd Fontenot from CentralTrak. I personally reached out to him, asking if he would come by my studio to look at a few art projects. The focus of this visit will be on the World Of Nomadic Fungi, a joint project I'm doing with the Nomadic Fungi Institute.
This week I have a studio visits lined up with Heyd Fontenot from CentralTrak. I personally reached out to him, asking if he would come by my studio to look at a few art projects. The focus of this visit will be on the World Of Nomadic Fungi, a joint project I'm doing with the Nomadic Fungi Institute.
Inviting someone to visit your studio is not to be taken lightly. You are asking them to go out of their way and spend their time indulging your need to have someone look at your artwork. You also have to keep in mind that your time with them is limited, somewhere between 1 and no longer than 2 hours. So, part of presenting yourself as a professional artist means having the artwork and the topics of discussion organized.
As a lot of you know, I spent last year cruising around on the Queasy Tugboat. This visit with Heyd is the first conversation I have had about my artwork with a respected art professional in quite sometime. I'll admit I'm having some anxiety and loosing a little sleep. To combat the jitters I made the following To Do List for myself:
1. Select/edit the artwork I want to focus on. Arrange it so that the visitor can see it without too much competing visual clutter. It should be mainly finished work, but a few works in progress mixed in is a good thing. The finished work is after all my product, what I will be showing to the public. And the works in progress show that I have new and exciting things coming up soon.
2. Decide what are the important topics I want to discuss. I am well aware that once I get started talking I can ramble on and on about art, art concepts, artists and the art world in general, and never get around to talking about MY artwork. So make a list that I can refer back to if/when we get too far off topic.
3. Next, I invited this person because they have skills and talents that are relative to what I am doing in the studio. So, create another list, this one focusing on their special skills and experiences. Make sure to incorporate this list into relative questions; You have experience working with alternative exhibit spaces, How do you approach people/businesses about setting up an exhibit in their space?
4. Talking is dry work, and listing sometimes requires a cool beverage to make things easier to swallow. Think about a gallery opening without wine and cheese. People simply don't linger when their hands are empty. Make sure there are beverages to offer; wine, beer, lemonade, sparkling water.
5. Lastly, burn a CD with an up to date CV and good images of my artwork. Don't forget to give it to him before he leaves!
Well, looks like I have everything covered. I should sleep like a baby tonight.... Wait a minute, I haven't even started cleaning up the studio!
Tuesday, June 11, 2013
Snow Globe or Lab Specimen
Been working on a series of sculptures that walk the line between snow globe and lab specimen.
I've never made a snow globe before, so I turned to the world of DIY videos. It's surprising how many there are out there, and how 90% of them are doing it wrong. For one thing, you have to submerge the globe in water while putting the lid on, other wise there is no way to prevent air bubbles.
I know what you are saying, Well mister smarty pants, I see an air bubble in your snow globe! Yes you do, and that is because I didn't presoak the ceramic sculpture before putting the lid on the globe. That air was trapped inside the pores of the ceramic. Who would have ever thought of that?
You might also be saying, Looks a little green inside that magical wonderland. That's probably due to the algae feeding on the proteins from the egg shells. Egg shells and mother of pearl are what they used before the invention of plastic snow flakes. That said, I kind of like the green. It adds a bit of realism to the old, musty lab specimen effect.
Wednesday, May 1, 2013
The Next Big Thing...
Well I don't know if Pinerest is going to really be the NEXT big think, but there is a lot of buzz around it, so I signed up for it. Wouldn't you know that my name is already taken. (One of the reasons to sign up early on these kinds of social networks) So here is the HTML address I ended up with http://pinterest.com/bradfordsmith13.
After you look through my stuff and move onto the sea of pictorial rabbit holes known as Pinterest, you will loose hours of your life looking at all the wonderful pictures that people have pinned.
As for weather Pinterest is a useful site and not just a time suck, I haven't decided yet. I have seen lots of wonderful art that is of a much higher quality than what I have found on Flicker.
The original Pinterest idea was that people would pin images that would link back to the original web site. I have found some new artists websites already. But! A good portion of the images have been detached from their original source, so they now float around the Pinterest sea being pinned over and over without the artist getting any credit or recognition.
Sunday, April 21, 2013
A Week With Li-Qua-Che 4.0
The nubby club is framed by plastic retaining walls to create a form to pour the plaster into. The model and walls are lightly sprayed with PAM as a release agent.
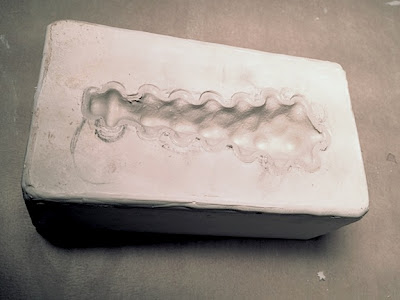
Here is the plaster mold after hardening. It still has the oil clay club in place which came out easily with the help of a pick to grab the oil clay and lift it out.
The mold is cleaned with a little naphtha to remove any oil residue. Now is also the time to clean the mold of any surface anomalies.
The mold is filled with Li-Qua-Che. After waiting 5 minutes the Li-Qua-Che is poured out leaving behind a 1/8" leather hard layer of Li-Qua-Che in the mold. In the photo you can see the Li-Qua-Che shell is pulling away from the plaster walls as it dries and shrinks.
Here are the two cast sides pulled from the same mold. In theory these two sides should fit together perfectly. But due to the shrinkage ratio of the Li-Qua-Che, the edges shrink back more than the surface areas. This creates edges that are thin, pointy and uneven. Keep that in mind when building your model. All edges need to be extended so that in the edges of the finished casting can be sanded back to create smooth even joins.
So, here is the nubby club glued together and the seams filled with spackle. Note that the surface shows finger prints and boogers found on the original oil clay model. If you don't clean up the model and/or clean the surface of the mold, you'll be cleaning those finger prints and boogers off every casting.
Well, That concludes our week of playing with Li-Qua-Che. I haven't even touched our projects that used two part molds. But I think that's more than enough posting about this topic. Any more and I will need to open an online Li-Qua-Che store, and that would expose me to way to many questions pertaining to doll heads.
Thursday, April 18, 2013
A Week With Li-Qua-Che 3.0
Due to the Dallas Art Fair with 83 galleries, multiple lectures and a few side art events, plus posting about the art fair for Art and Seek, these last two BFS blog posts about Li-Qua-Che had to be postponed until this week. Anyway, back to fun with liquid paper mache... Size does make a difference.
This photo shows the plaster mold and the back side of the cast tile. The compactness of this tile design avoided issues of warpage. The tile also held up to the stress test of being dropped on the floor. (An accident that we will take credit for doing)
We did notice that the edges of the tile were a bit ruff. With that in mind, when designing a one piece mold, the model should be fabricated a little taller so the ragged edges can be sanded down to form a straight, smooth edge.
Tuesday, April 2, 2013
Discovering Free Dallas Art Fair Tickets
The fifth annual Dallas Art Fair is just around the corner, and with 83 galleries in this years line up, 40 of which are first time participants, I am starting to get really excited to see some new and exciting artwork.
While perusing the local media coverage for this event I discovered two wonderful things which I am very excited to share with my BFS Blog subscribers. First is the new art and entertainment website CultureMap. They have been around for a while but I just found out about them.
The second discovery is that CultureMap in their post Enthusiasts Experience Dallas Art Fair for Free on Professionals Day posted a pass code that allows you to purchase free tickets to the Dallas Art Fair!
NOW you have no excuse to miss the most important art event in the DFW metroplex!
Tuesday, March 26, 2013
A Week With Li-Qua-Che 2.0
This post continues with our week long experiments with Li-Qua-Che. The photo above shows design model #2. The cork sub-straight has been gessoed and oil clay has been added to smooth out and build up the surface.
And here is the finished Li-Qua-Che casting. The Li-Qua-Che picks up every detail including scratches and finger prints. So make you model as smooth as possible, and then smooth the walls of the plaster mold as well.
There was some difficulty getting the casting out of the mold, but with the help of a small pallet knife, it finally came free. The real issue was that while the casting was sitting on the table curing, it began to sag and warp.
Summing up our experiments so far, this material is surprisingly strong, but it has size limitations. It will not hold its shape if casting a single sided tile over 10" in size. With that in mind we'll move onto designing two more projects; a smaller 8" tile, and an object that is similar in proportion to a doll head.
Here's a link to some more Li-Qua-Che tips at Konittajo's Playhouse.
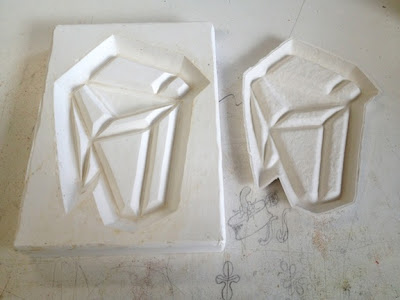
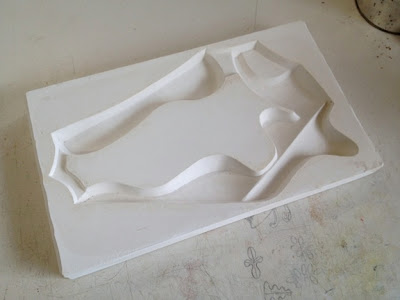
This is the plaster mold pulled from the above model. It has cured in the oven over night. The mold measures about 12" square.
There was some difficulty getting the casting out of the mold, but with the help of a small pallet knife, it finally came free. The real issue was that while the casting was sitting on the table curing, it began to sag and warp.
Summing up our experiments so far, this material is surprisingly strong, but it has size limitations. It will not hold its shape if casting a single sided tile over 10" in size. With that in mind we'll move onto designing two more projects; a smaller 8" tile, and an object that is similar in proportion to a doll head.
Here's a link to some more Li-Qua-Che tips at Konittajo's Playhouse.
Friday, March 22, 2013
A Week With Li-Qua-Che 1.0
My good friend and fellow artist Kent Peaslee came down from Chicago to spend a week with me playing with Li-Qua-Che. It was like creating our own artists residency.
What is Li-Qua-Che? Basically it's a liquid paper mache that has been refined to the point that it looks more like porcelain slip. It's designed to make slip castings of things like doll heads.
During our week of investigation, we played with a lot of casting techniques, learning a lot and pushing the product to its limits. Over the next four BFS blog posts I'll be reviewing projects that focus on casting a tile from a one piece mold.
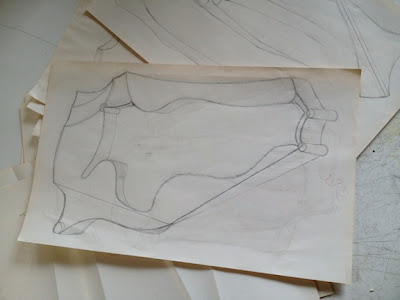
Our first project was to create an 8"x11" sculptural tile that incorporates an open space in the center of the tile. Above is the original design drawing.
Now for some casting. Here the Li-Qua-Che has been poured into the mold. After waiting 8 minutes it was poured out of the mold. What remains is a 1/8" thick wall of Li-Qua-Che (The gray stuff).
The Li-Qua-Che shrinks 4-7% as it dries. Just like slip casting with ceramic slip, it pulls away from the walls releasing itself. In theory, as long as there are not undercuts, the casting, after 30-60 minutes should just drop out of the mold. Unfortunately our design with the big open space in the middle of the tile created a large solid form that the Li-Qua-Che locked onto as it shrank. Getting it out of the mold caused cracks in the casting. After curing, the casting simply fell apart at the weakest structural points.
What is Li-Qua-Che? Basically it's a liquid paper mache that has been refined to the point that it looks more like porcelain slip. It's designed to make slip castings of things like doll heads.
During our week of investigation, we played with a lot of casting techniques, learning a lot and pushing the product to its limits. Over the next four BFS blog posts I'll be reviewing projects that focus on casting a tile from a one piece mold.
Our first project was to create an 8"x11" sculptural tile that incorporates an open space in the center of the tile. Above is the original design drawing.
In this photo we are building the sub-straight for the tile using sheets of cork. We then covered the cork with oil clay and added some details.
This is the plaster mold we pulled from the model. The mold was placed in a warm oven to speed the evaporation of the water from the plaster. Be careful doing this as the plaster will go through thermal shock if it gets too hot too quickly or cools down too fast.
Now for some casting. Here the Li-Qua-Che has been poured into the mold. After waiting 8 minutes it was poured out of the mold. What remains is a 1/8" thick wall of Li-Qua-Che (The gray stuff).
The Li-Qua-Che shrinks 4-7% as it dries. Just like slip casting with ceramic slip, it pulls away from the walls releasing itself. In theory, as long as there are not undercuts, the casting, after 30-60 minutes should just drop out of the mold. Unfortunately our design with the big open space in the middle of the tile created a large solid form that the Li-Qua-Che locked onto as it shrank. Getting it out of the mold caused cracks in the casting. After curing, the casting simply fell apart at the weakest structural points.
Subscribe to:
Posts (Atom)


