Showing posts with label Li-Qua-Che. Show all posts

Sunday, April 21, 2013

A Week With Li-Qua-Che 4.0

Li-Qua-Che, Brad Ford Smith
This is our fourth and last Li-Qua-Che project. This time we are creating a small one piece mold that will be used to cast both sides of an object. The photo above shows the oil clay model of a 4" nubby club just before pouring on the plaster.

Li-Qua-Che, Brad Ford Smith
The nubby club is framed by plastic retaining walls to create a form to pour the plaster into. The model and walls are lightly sprayed with PAM as a release agent. 

Li-Qua-Che, Brad Ford Smith
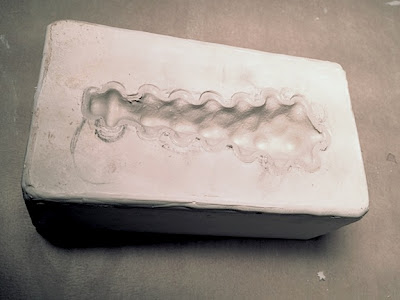
Here is the plaster mold after hardening. It still has the oil clay club in place which came out easily with the help of a pick to grab the oil clay and lift it out.

Li-Qua-Che, Brad Ford Smith
The mold is cleaned with a little naphtha to remove any oil residue. Now is also the time to clean the mold of any surface anomalies. 

Li-Qua-Che, Brad Ford Smith
The mold is filled with Li-Qua-Che. After waiting 5 minutes the Li-Qua-Che is poured out leaving behind a 1/8" leather hard layer of Li-Qua-Che in the mold. In the photo you can see the Li-Qua-Che shell is pulling away from the plaster walls as it dries and shrinks.

Li-Qua-Che, Brad Ford Smith
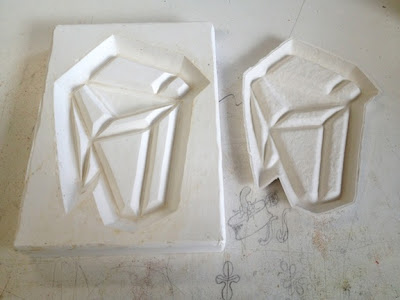
Here are the two cast sides pulled from the same mold. In theory these two sides should fit together perfectly. But due to the shrinkage ratio of the Li-Qua-Che, the edges shrink back more than the surface areas. This creates edges that are thin, pointy and uneven.  Keep that in mind when building your model. All edges need to be extended so that in the edges of the finished casting can be sanded back to create smooth even joins.

Li-Qua-Che, Brad Ford Smith
So, here is the nubby club glued together and the seams filled with spackle. Note that the surface shows finger prints and boogers found on the original oil clay model. If you don't clean up the model and/or clean the surface of the mold, you'll be cleaning those finger prints and boogers off every casting.

Well, That concludes our week of playing with Li-Qua-Che. I haven't even touched our projects that used two part molds. But I think that's more than enough posting about this topic. Any more and I will need to open an online Li-Qua-Che store, and that would expose me to way to many questions pertaining to doll heads.


Thursday, April 18, 2013

A Week With Li-Qua-Che 3.0

Due to the Dallas Art Fair with 83 galleries, multiple lectures and a few side art events, plus posting about the art fair for Art and Seek, these last two BFS blog posts about Li-Qua-Che had to be postponed until this week. Anyway, back to fun with liquid paper mache... Size does make a difference.

Li-Qua-Che, Brad Ford Smith
In our past Li-Qua-Che projects we made large tiles that had issues with de-molding, warpage and strength. In this project we scaled down the tile to 5"x 8". We also dropped the idea of incorporating open areas/holes into the design. Above is our smaller finished tile after curing over night. You can tell by the surface that it still needs some light sanding with 0000 steel wool to smooth it out.

Li-Qua-Che, Brad Ford Smith
This photo shows the plaster mold and the back side of the cast tile. The compactness of this tile design avoided issues of warpage. The tile also held up to the stress test of being dropped on the floor. (An accident that we will take credit for doing)

We did notice that the edges of the tile were a bit ruff. With that in mind, when designing a one piece mold, the model should be fabricated a little taller so the ragged edges can be sanded down to form a straight, smooth edge.

Tuesday, March 26, 2013

A Week With Li-Qua-Che 2.0

Li-Qua-Che, Brad Ford Smith
This post continues with our week long experiments with Li-Qua-Che. The photo above shows design model #2. The cork sub-straight has been gessoed and oil clay has been added to smooth out and build up the surface.

Li-Qua-Che, Brad Ford Smith
This is the plaster mold pulled from the above model. It has cured in the oven over night. The mold measures about 12" square.

Li-Qua-Che, Brad Ford Smith

And here is the finished Li-Qua-Che casting. The Li-Qua-Che picks up every detail including scratches and finger prints. So make you model as smooth as possible, and then smooth the walls of the plaster mold as well.

There was some difficulty getting the casting out of the mold, but with the help of a small pallet knife, it finally came free. The real issue was that while the casting was sitting on the table curing, it began to sag and warp.

Summing up our experiments so far, this material is surprisingly strong, but it has size limitations. It will not hold its shape if casting a single sided tile over 10" in size. With that in mind we'll move onto designing two more projects; a smaller 8" tile, and an object that is similar in proportion to a doll head.

Here's a link to some more Li-Qua-Che tips at Konittajo's Playhouse.

Friday, March 22, 2013

A Week With Li-Qua-Che 1.0

Li-Qua-Che, Brad Ford Smith
My good friend and fellow artist Kent Peaslee came down from Chicago to spend a week with me playing with Li-Qua-Che. It was like creating our own artists residency.

What is Li-Qua-Che? Basically it's a liquid paper mache that has been refined to the point that it looks more like porcelain slip. It's designed to make slip castings of things like doll heads.

During our week of investigation, we played with a lot of casting techniques, learning a lot and pushing the product to its limits. Over the next four BFS blog posts I'll be reviewing projects that focus on casting a tile from a one piece mold.

Li-Qua-Che, Brad Ford Smith
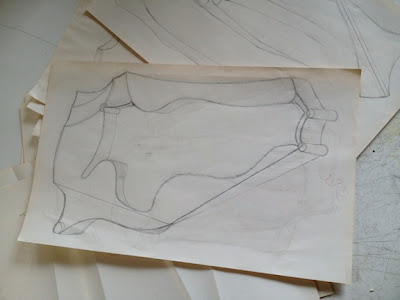
Our first project was to create an 8"x11" sculptural tile that incorporates an open space in the center of the tile. Above is the original design drawing.

Li-Qua-Che, Brad Ford Smith
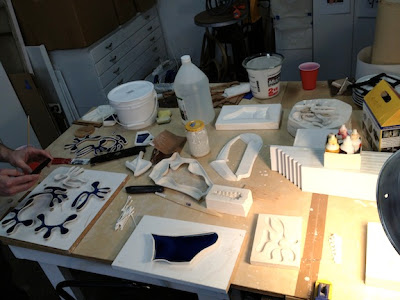
In this photo we are building the sub-straight for the tile using sheets of cork. We then covered the cork with oil clay and added some details. 

Li-Qua-Che, Brad Ford Smith
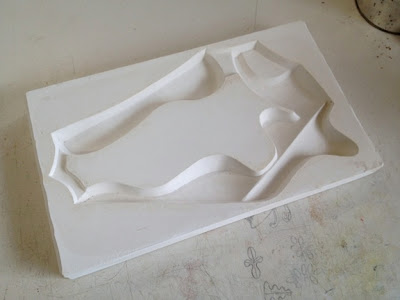
This is the plaster mold we pulled from the model. The mold was placed in a warm oven to speed the evaporation of the water from the plaster. Be careful doing this as the plaster will go through thermal shock if it gets too hot too quickly or cools down too fast.

Li-Qua-Che, Brad Ford Smith
Now for some casting. Here the Li-Qua-Che has been poured into the mold. After waiting 8 minutes it was poured out of the mold. What remains is a 1/8" thick wall of Li-Qua-Che (The gray stuff).

Li-Qua-Che, Brad Ford Smith
The Li-Qua-Che shrinks 4-7% as it dries. Just like slip casting with ceramic slip, it pulls away from the walls releasing itself. In theory, as long as there are not undercuts, the casting, after 30-60 minutes should just drop out of the mold. Unfortunately our design with the big open space in the middle of the tile created a large solid form that the Li-Qua-Che locked onto as it shrank. Getting it out of the mold caused cracks in the casting. After curing, the casting simply fell apart at the weakest structural points.